Orchestration of Exchange online mailbox size reports using Azure automation & Microsoft Graph API
Reporting in M365 has come a long way. We all know that anyone with the proper access can view the M365 reports in the admin portal with a splendid graphical view. What if the operations team wants to get the notifications to a mailbox if the mailbox size reaches a specific limit (example use case)? My initial thoughts were to use SendGrid to send emails, but I thought we could use graph API and an Azure AD application to send emails rather than relying on a third-party email solution. I planned to use Azure automation to query the mailbox size from the Exchange online & use Microsoft Graph API to send emails.
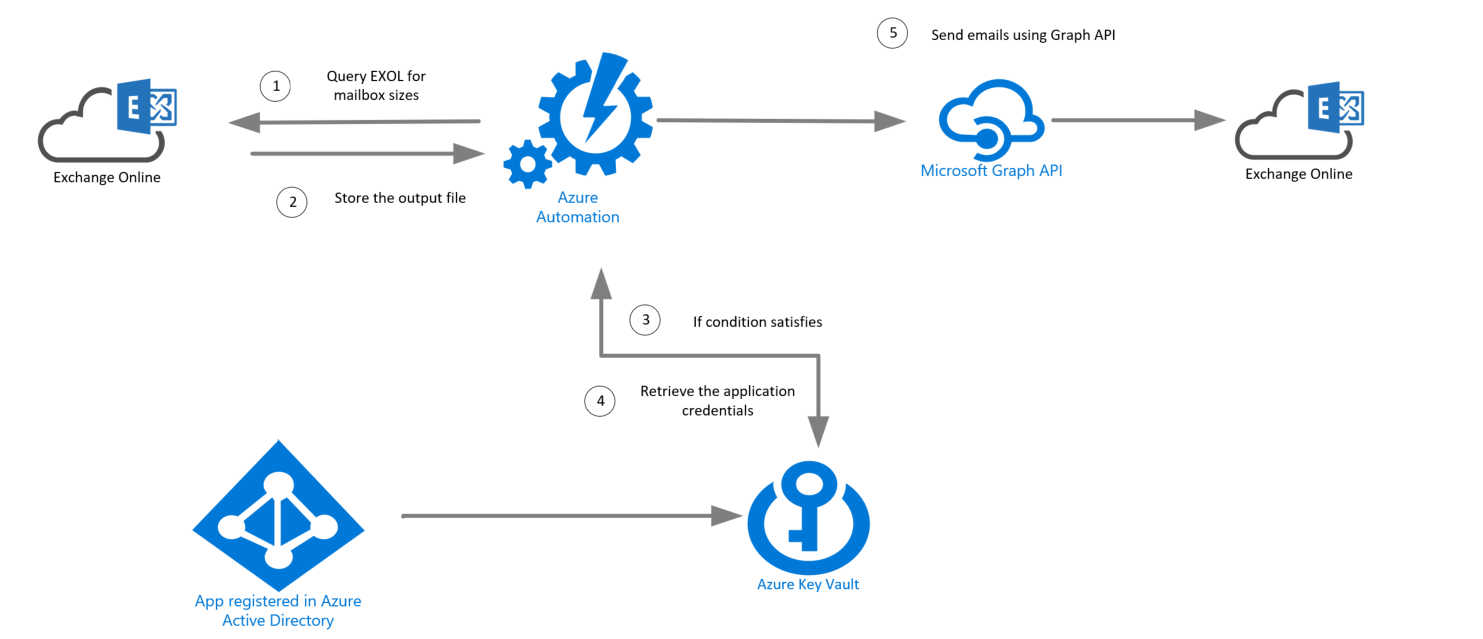
Upon researching how to automate the mailbox size reports using Azure automation & Microsoft Graph API, I came to the following solution.
Solution Overview
The Azure run as account will extract Exchange online mailbox statistics using Azure automation in the solution. Suppose we find any mailboxes that are above a specific limit. In that case, the automation account will query the Azure key vault to retrieve credentials of an Azure AD application to send email alerts using Microsoft Graph API.
You can learn more about Microsoft Graph API on how to send emails.
Microsoft Graph API documentation
We need the following to achieve the above solution.
- Azure Automation Account
- Exchange online module
- Microsoft Graph API
- Azure Key Vault
Azure Automation Account
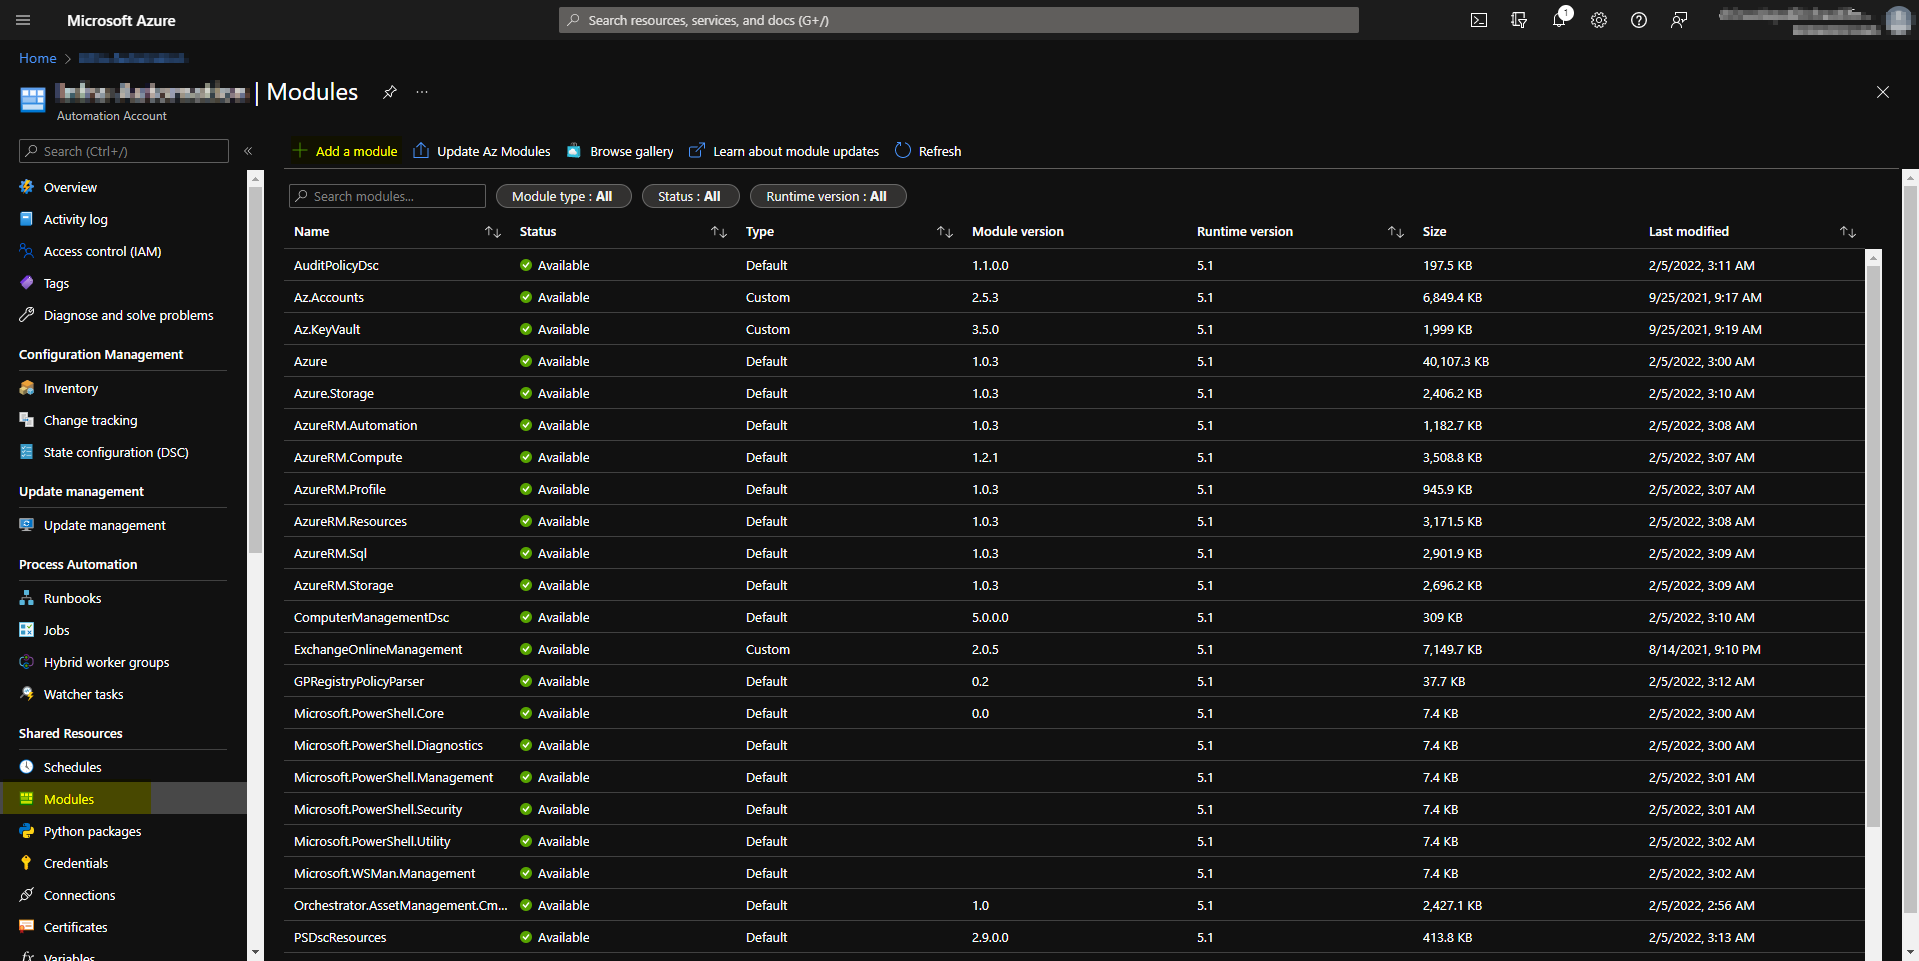
You need to have an Azure automation account to run Azure automation jobs. Upon automation account & new runbook creation, you need to assign the Exchange administrator permission to run as account service principal. You can give the permissions via PowerShell or from GUI. You need to install the Exchange online module PowerShell in the automation account. You can get that from the modules gallery, as shown below.
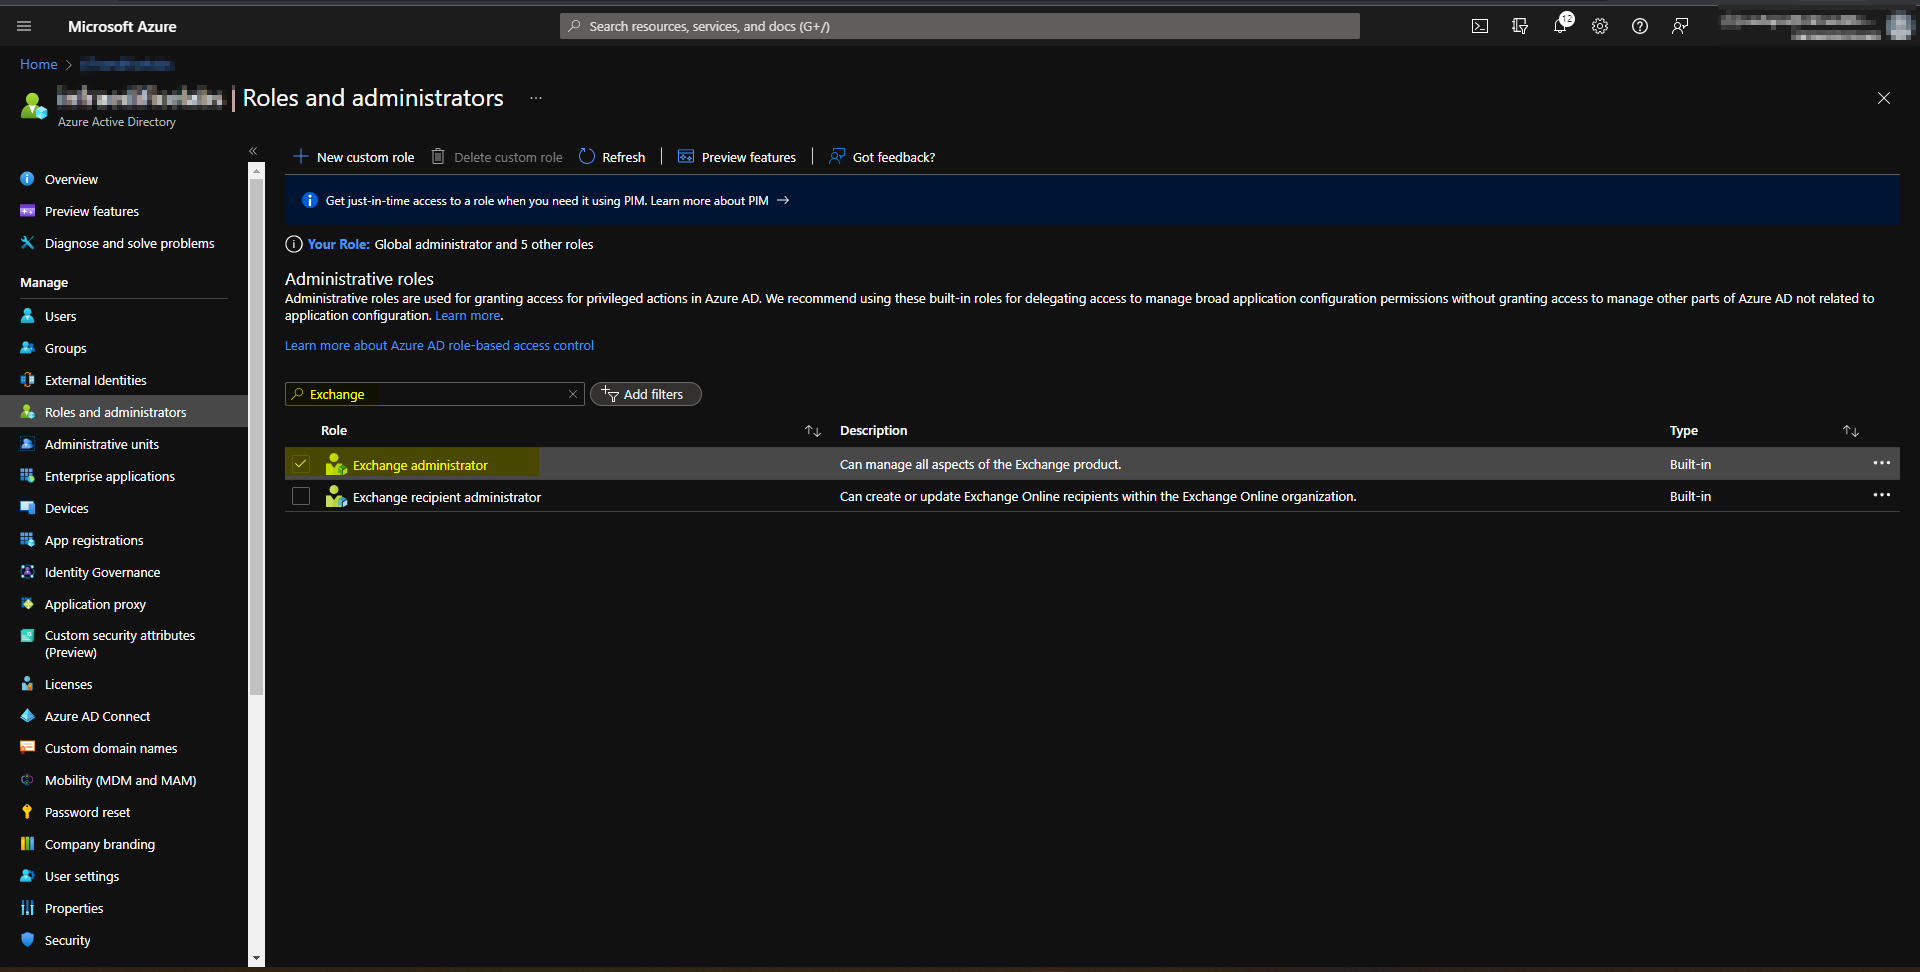 Exchange Administrator role in Azure AD roles & responsibilites.
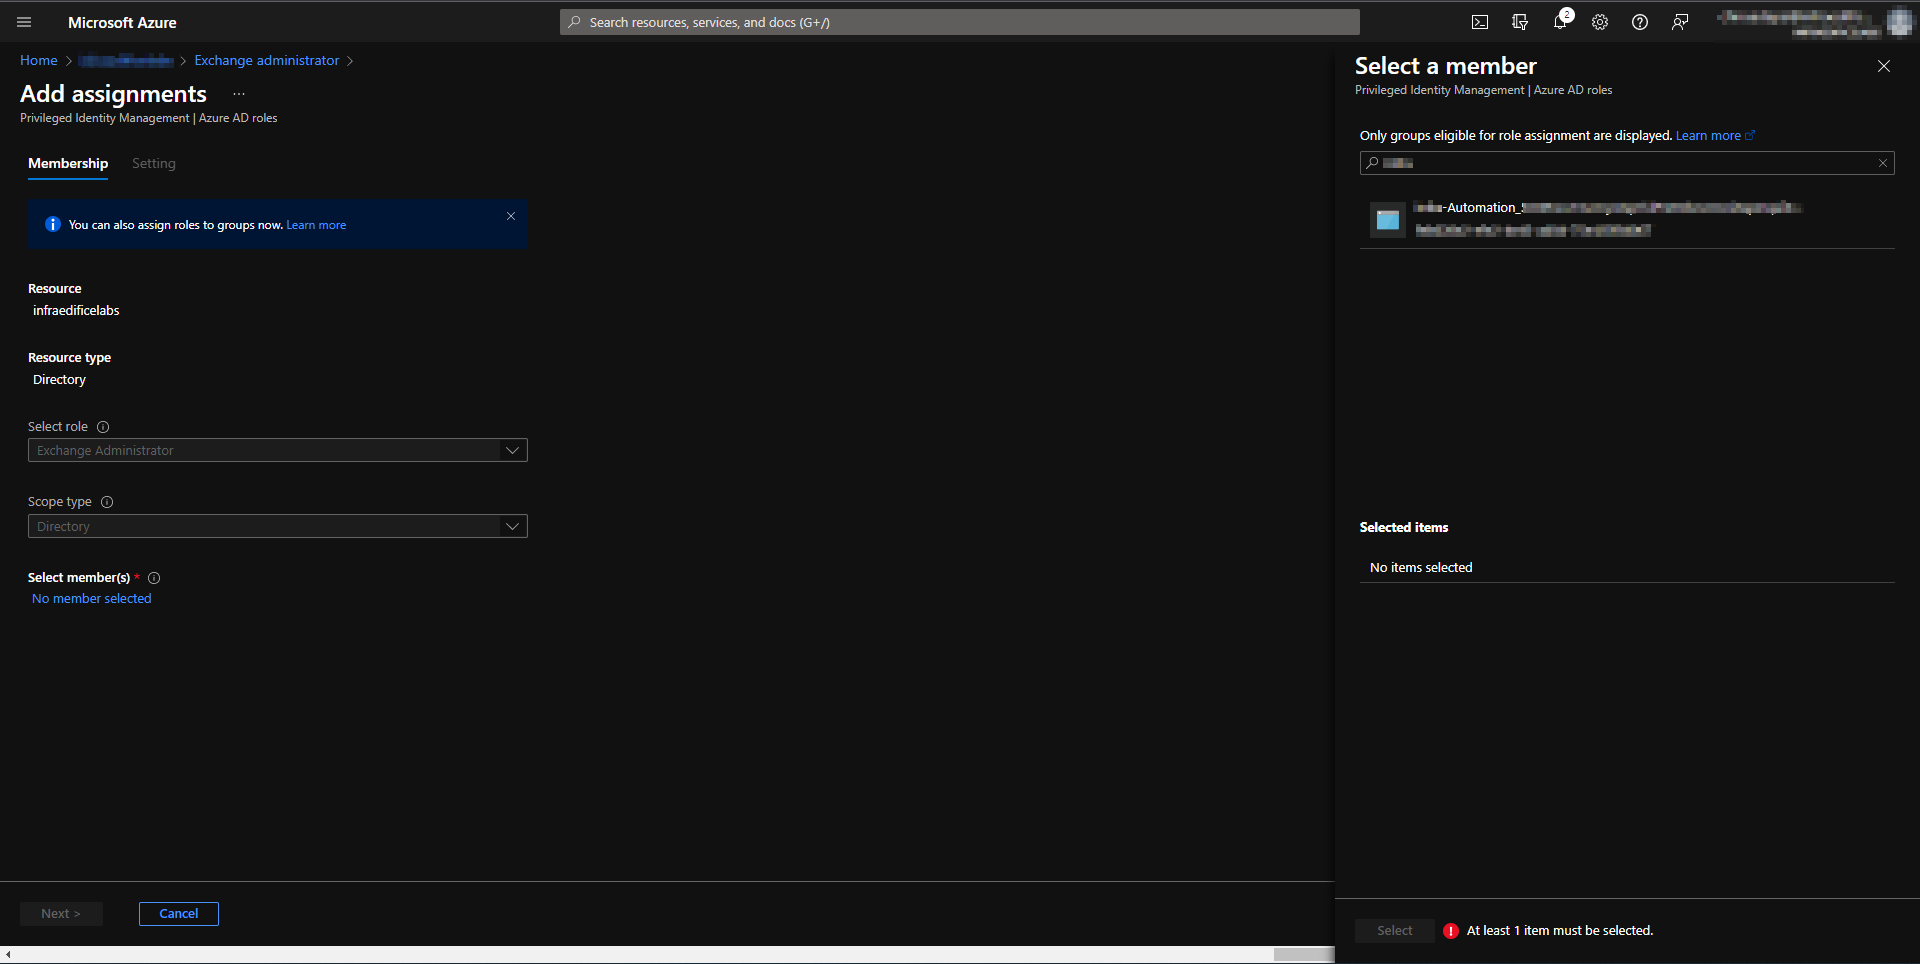 Assigning Exchange administrator role to run as account service principal.
 Exchange online powershell module
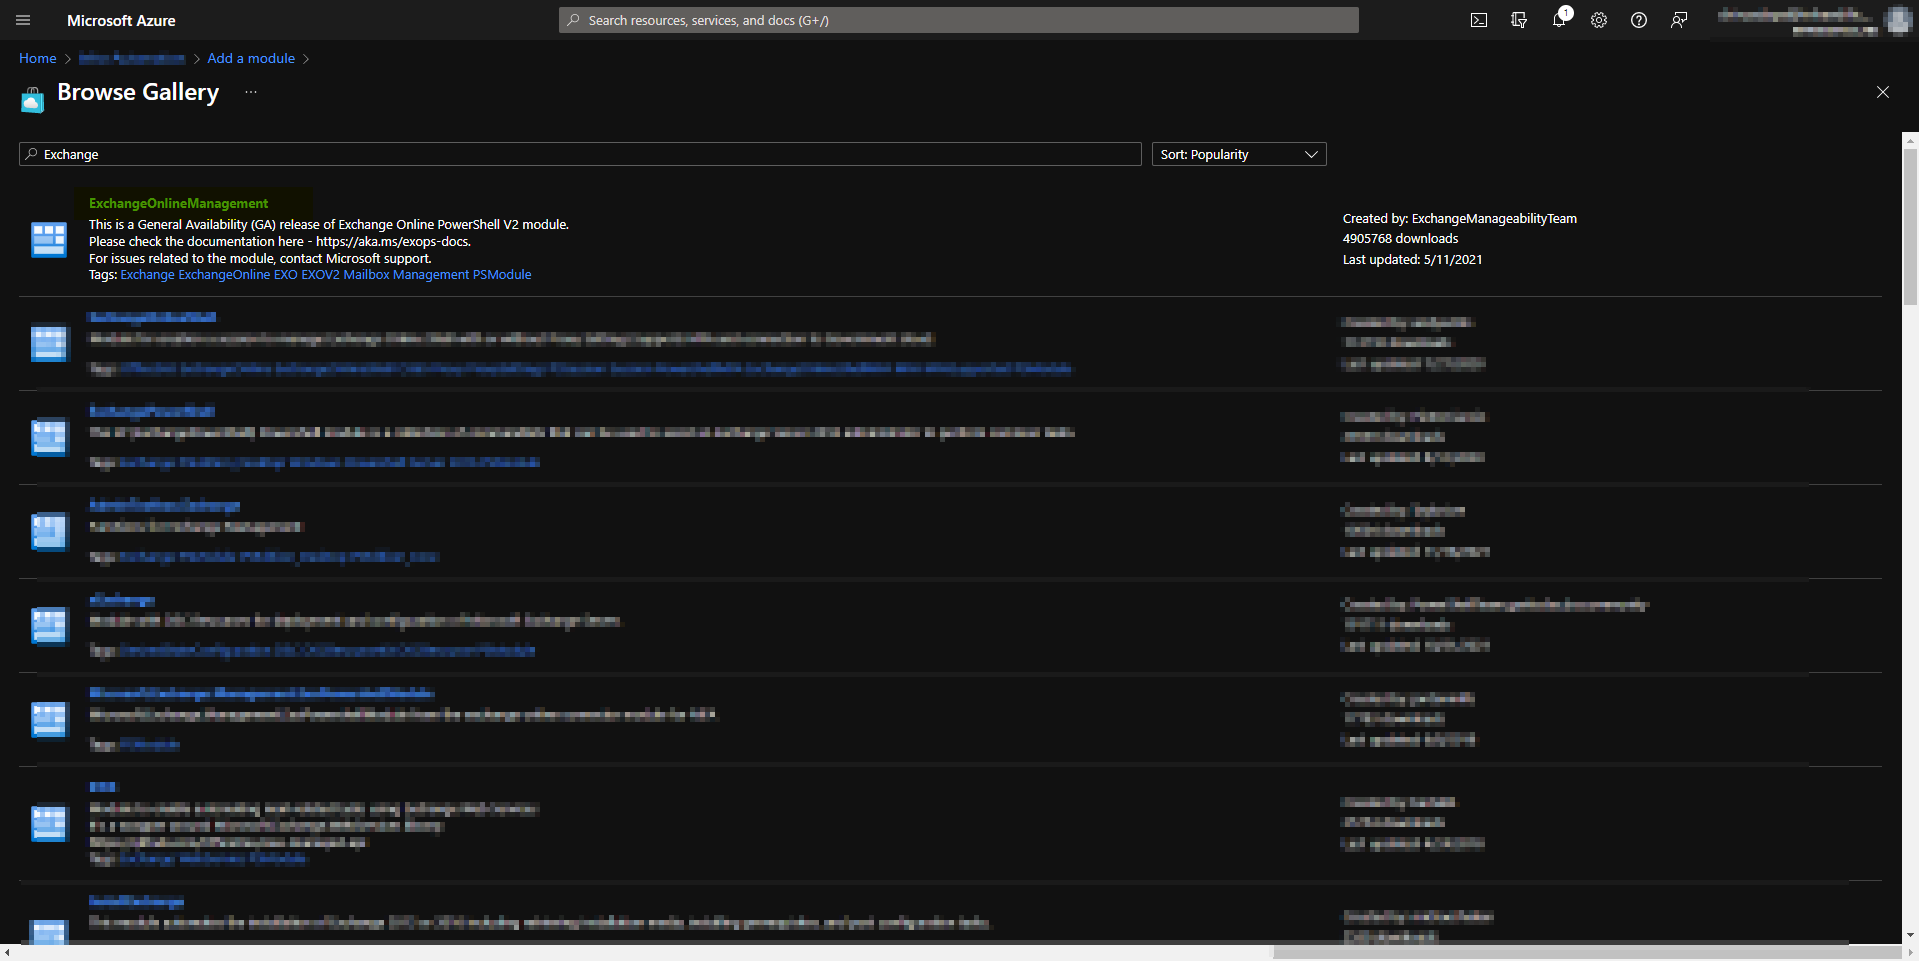 Exchange online powershell module in the gallery.
App registration in Azure AD
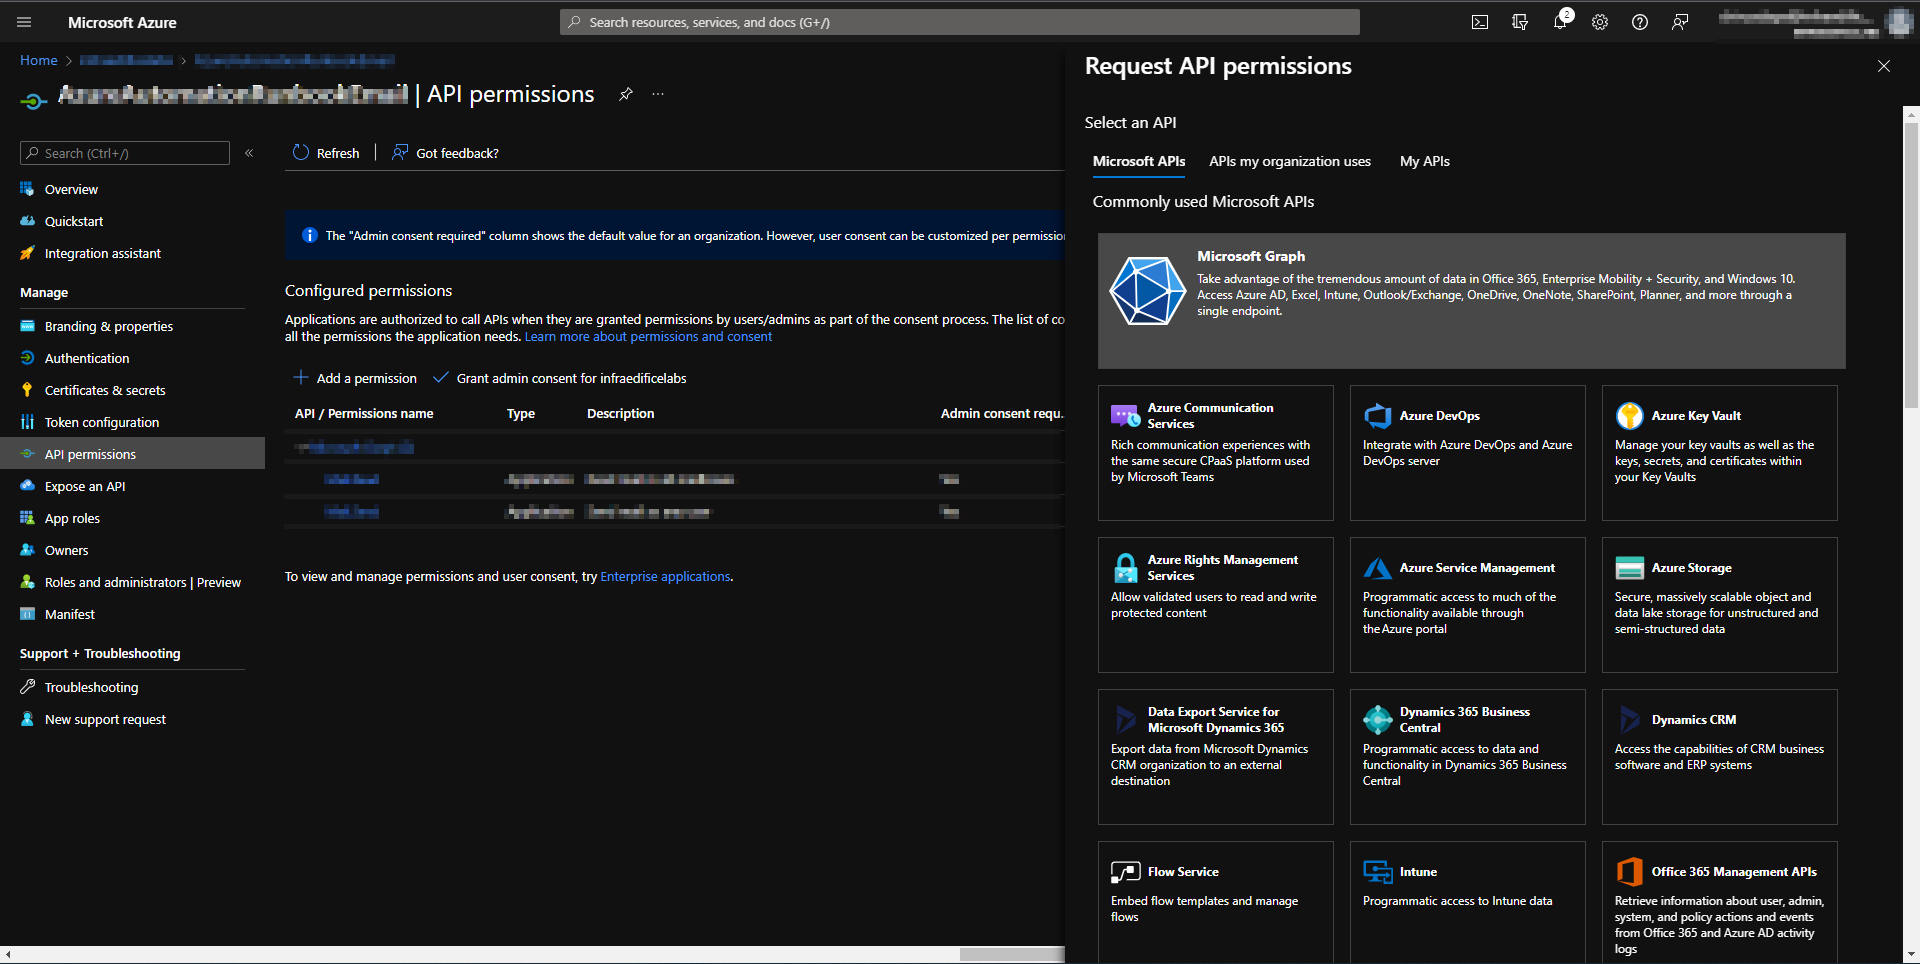
Create and register a new application in Azure AD to send emails using Microsoft Graph API. Upon creating and registering the application, you need to assign Microsoft Graph API permissions to send emails on behalf of users. You need to choose application permissions in the Microsoft Graph API.
 Microsoft Graph API permissions.
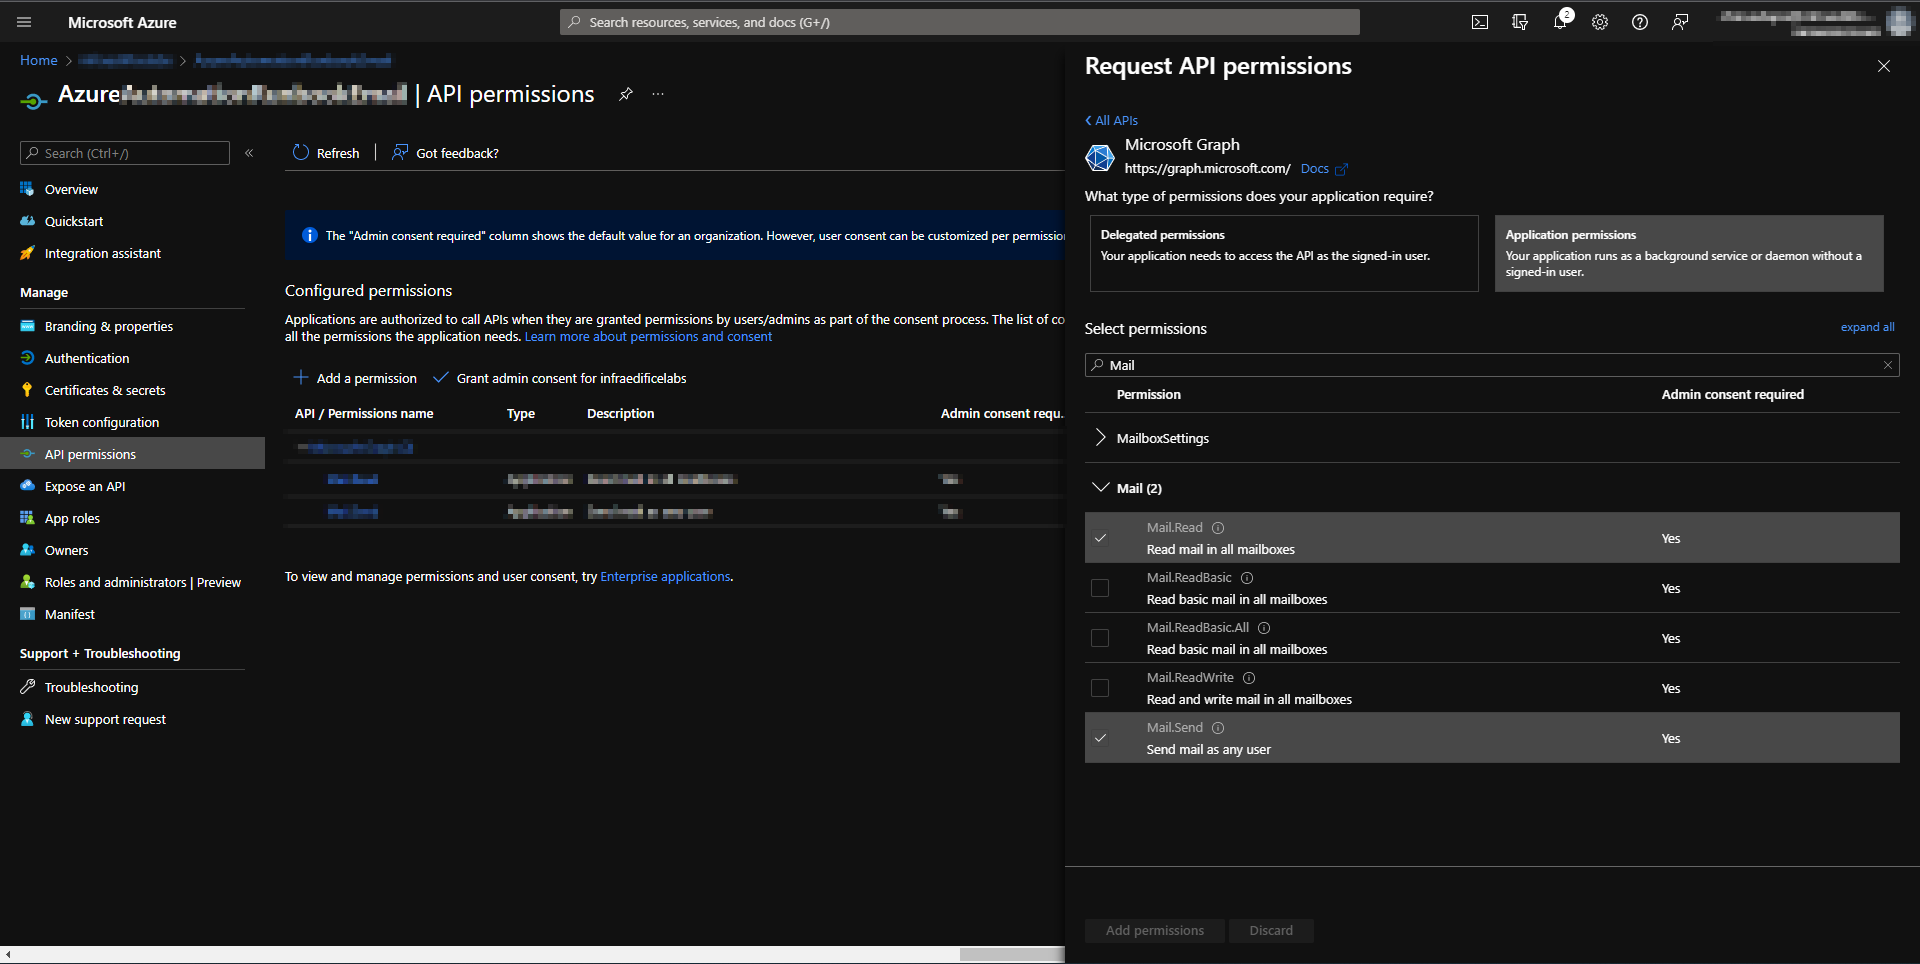 Assigning Microsoft Graph API application permissions.
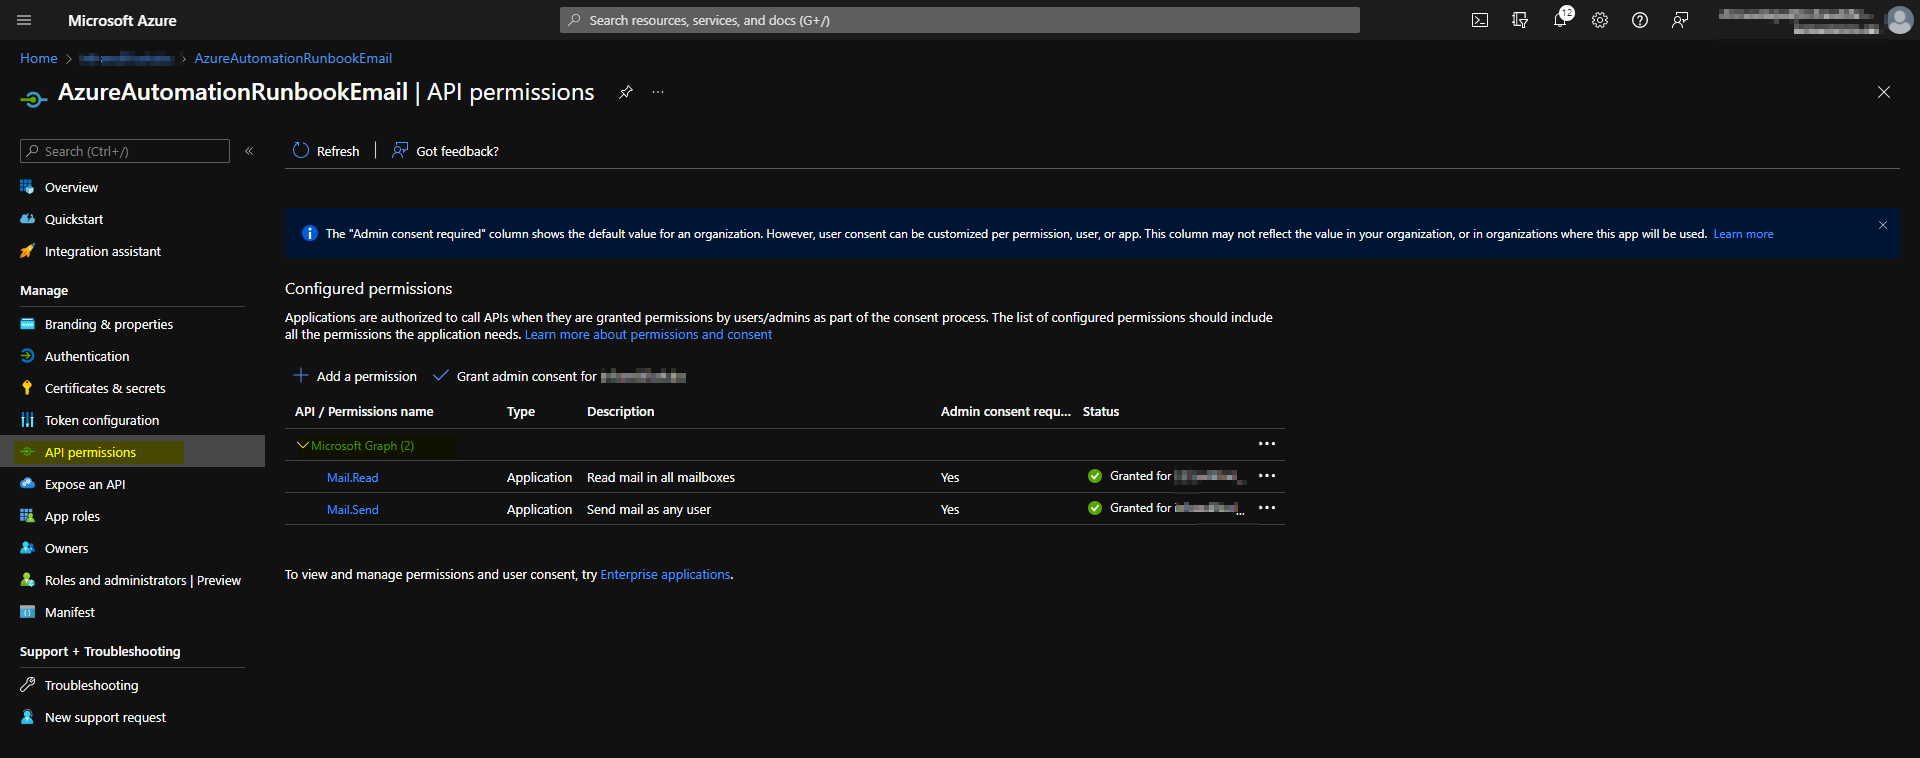 Microsoft Graph API permissions on the Azure AD Application.
Now, we need to authenticate the application from the custom code in the runbook. I will do this by configuring a client secret in the application. Make sure to copy the secret upon creation as you can’t see the client secret again.
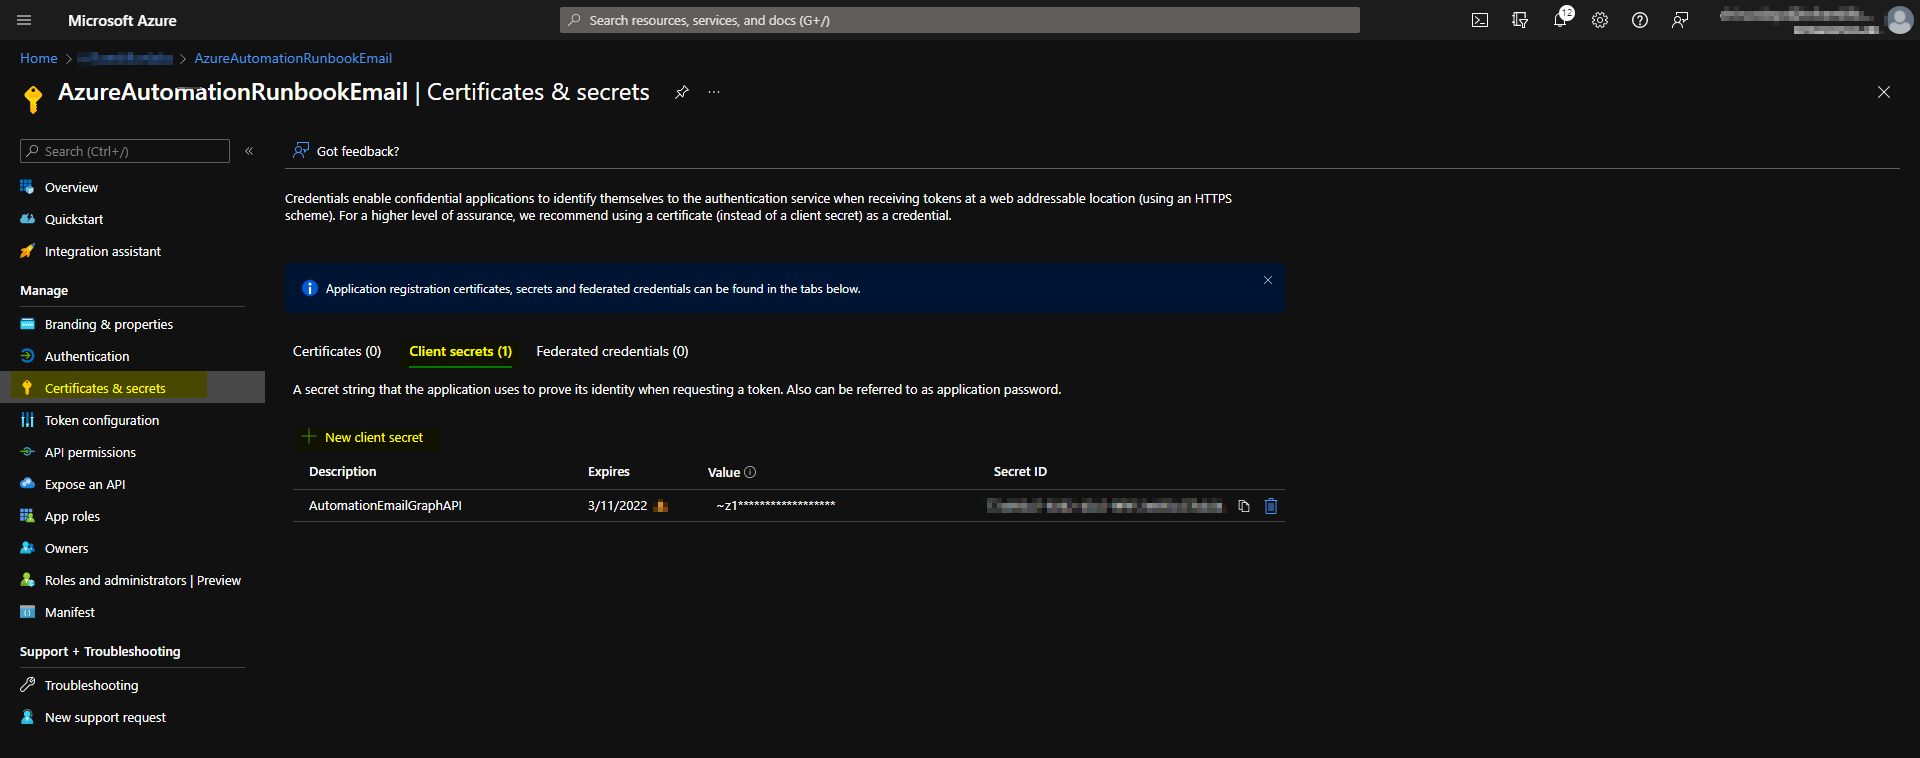 Client secret in Azure AD Application.
Azure key Vault
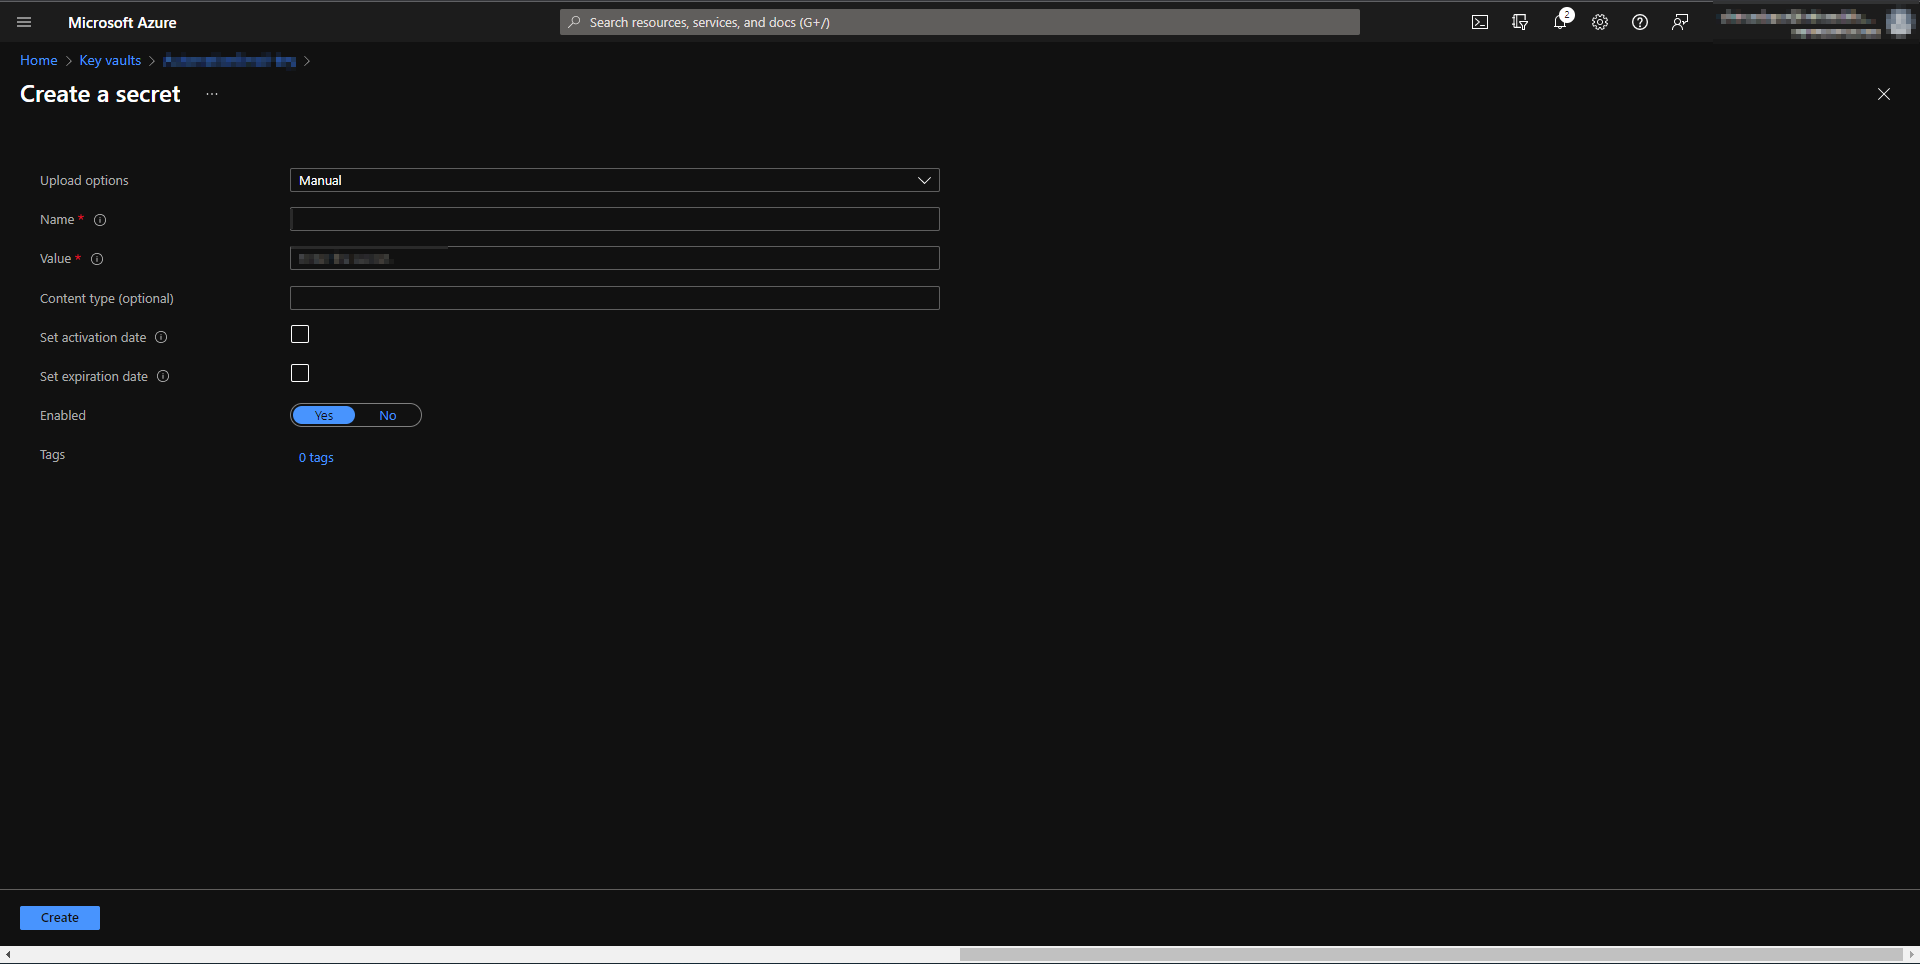
We will leverage Azure Key Vault to securely store the client secret we created for the Azure AD Application. We manually generate a new secret in the Azure key vault. Upon holding the client secret, we will assign “Get” permissions to the “run as account” in the key vault access policies to retrieve the secret. We don’t need any other permissions as we are just retrieving the secret.
 Generate secret in Azure key Vault.
Run the below code to send secure emails from the Azure automation runbook using Graph API.
I categorized the code into three parts.
- Import modules & Azure Automation account connection
- Mailbox size report from Exchange online
- Microsoft Graph API to send emails
Import modules & Azure Automation account connection
You need to import the Azure, Azure key vault and Exchange online modules and connect to the Azure automation account from the runbook as shown below.
Import-module AZ.Accounts
Import-module Az.Keyvault
Import-module Exchangeonlinemanagement

### Connecting to Azure Automation Account ###
try {

    $connection = Get-AutomationConnection -Name AzureRunAsConnection
    $tenantName = "test.onmicrosoft.com"
    $Azureaccount = Connect-AzAccount `
        -ServicePrincipal `
        -TenantId $Connection.TenantId `
        -ApplicationId $Connection.ApplicationId `
        -CertificateThumbprint $Connection.CertificateThumbprint
}
catch
{
    if (!$Connection)

    {
        ## Run as Account not configured ##
        $error = "Connecting to $connection failed"
        throw $error
    }
    else
    {
        ## Something else went wrong ##
        write-error -message $_.Exception.message
        throw $_.Exception
    }
}
Mailbox size report from Exchange online
Authentication to Exchange online will be done using the “run as account”. Run the below PowerShell code to extract the mailbox size report for mailboxes greater than a specific limit.
### Connecting to Exchange online ###
Connect-ExchangeOnline -CertificateThumbprint $connection.CertificateThumbprint -AppId $connection.ApplicationID -Organization $tenantName -Verbose
# Date Format
$CurrentDate = (get-date).ToString('yyyy-MM-dd')
$CurrentDate
#Mailboxes
$Mailboxes = Get-Mailbox -ResultSize Unlimited | Select-Object Name, Alias, ExchangeGuid
$Output = @()
$i = 1
Foreach ($Mailbox in $Mailboxes)
{
    $Mailboxsize = Get-MailboxStatistics -Identity "$($mailbox.ExchangeGuid)" | Select-Object DisplayName, MailboxTypeDetail, @{name=”TotalItemSize”; expression={[math]::Round(($_.TotalItemSize.ToString().Split(“(“)[1].Split(” “)[0].Replace(“,”,””)/1GB),2)}}, IsArchiveMailbox

    if ($mailboxsize.TotalItemSize -gt "90") {

        $Mailboxesabovelimit = New-Object -TypeName psobject -Property @{

            DisplayName = $Mailboxsize.DisplayName
            Emailaddress = $mailbox.PrimarySmtpAddress
            MailboxType = $Mailboxsize.MailboxTypeDetail
            MailboxSize = $Mailboxsize.TotalItemSize
            ArchiveStatus = $Mailboxsize.IsArchiveMailbox

        }
        $Output += $Mailboxesabovelimit
    }
    $i++
}

$Output

$filename = "MailboxSizes"+"$currentdate"+"."+"csv"

$filename

$path = "$Env:temp\$filename"

$path

$Output | Export-Csv -Path $path -NoTypeInformation
Microsoft Graph API to send emails
Run the below code to send the emails using Graph API securely. You can modify the email template as per your requirement. I used a shared mailbox to send notification emails.
if ($Output)
{

$base64string = [convert]::ToBase64String((Get-Content -path $path -Encoding byte))

#### key vault Name ###

$keyvault = "Enter your Keyvault name"

### Secret Name in the key Vault ###

$keyvaultSecretName = "Enter your secret name from the Keyvault"

### Application ID of the Azure AD App registration ###

$Application_ID = "xxxx-xxxx-xxxxx-12345"

### Tenant ID of the Azure AD App registration ###

$TenantID = $connection.TenantId

### From Address of the Email from Exchange online ###

$from = "[email protected]"

### To Address of the email ###

$to = "[email protected]"

### Getting the secret from Azure Keyvault ###

$secret = Get-AzKeyVaultSecret -VaultName $KeyVault -Name $KeyVaultSecretName


$Securestringpointer = [System.Runtime.InteropServices.Marshal]::SecureStringToBSTR($secret.SecretValue)


try {

   $secretValueText = [System.Runtime.InteropServices.Marshal]::PtrToStringBSTR($Securestringpointer)

}

finally {

   [System.Runtime.InteropServices.Marshal]::ZeroFreeBSTR($Securestringpointer)

}


$client_secret = $secretValueText

$request = @{
        Method = 'POST'
        URI    = "https://login.microsoftonline.com/xxxxxxxxxx/oauth2/v2.0/token"
        body   = @{
            grant_type    = "client_credentials"
            scope         = "https://graph.microsoft.com/.default"
            client_id     = $Application_ID
            client_secret = $client_secret
        }
    }
$token = (Invoke-RestMethod @request).access_token

#$token

## Build the Microsoft Graph API request

## Header ##

$headers = @{
    "Authorization" = "Bearer $($token)"
    "Content-type"  = "application/json"
}

## Sending email ##

$sendURL = "https://graph.microsoft.com/v1.0/users/$from/sendMail"

$mailbody = @"
                    {
                        "message": {
                          "subject": "MailboxSize Report - $CurrentDate",
                          "body": {
                            "contentType": "HTML",
                            "content": "Email content."
                          },

                          "toRecipients": [
                            {
                              "emailAddress": {
                                "address": "$to"
                              }
                            }
                          ]
                          ,"attachments": [
                            {
                              "@odata.type": "#microsoft.graph.fileAttachment",
                              "name": "$FileName",
                              "contentType": "text/csv",
                              "contentBytes": "$base64string"
                            }
                          ]
                        },
                        "saveToSentItems": "false"
                      }
"@

Invoke-RestMethod -Method POST -Uri $sendURL -Headers $headers -Body $mailbody

}

else
{
    Write-Verbose -Verbose "Customized error message"
}
You can schedule the runbook as per your requirement.
I hope you enjoy the blog!
Chiru